Friday, July 24, 2009

The Chewiest Chocolate Chip Cookie ever!

And..all thanks to a 15, well, 16 already year old guy. He is so passionate about his craft..and I love passionate people. I may have 3 sons...but at this point of time, I wish he was my 4th!

Again, this is the noob way. With pictures..so people will see what's happening. If you're an experienced cook/chef/pastry chef.... go. Please. Thank you.

Now *fans ownself to cool down*...

Let's goooooo!

The foodie I'm talking about, posted up the bestest chewiest choc chip cookie recipe..and I followed it to a 'T'. Except for the last part, which had some fancy named salt. I didn't bother salting it...coz, when the smell of heavenly butter mixed with choc chips wafted through the air, all I could think about, was, when I can eat them?

I always thought baking cookies were so difficult, because one needed to use hands. What with the mixing with hands, rolling them into balls..and with cookies, there are so many of them! I'm not opposed to using my 10 digits....I'm just l-a-z-y!

So, on with the recipe! It's the same as his, only thing I converted it from American terms to well, my terms (which is British, tho I'm not!). Also..best you read why the recipe calls for certain ingredients at his post, so, you won't want to use anything else, to get this guaranteed result.
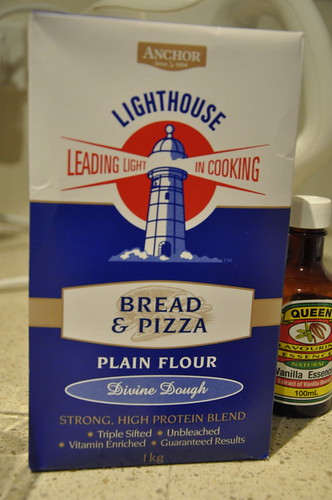
280gm bread flour
1 tsp baking soda
1 tsp salt
225gm unsalted butter
210gm packed brown sugar
2 tsp pure vanilla extract
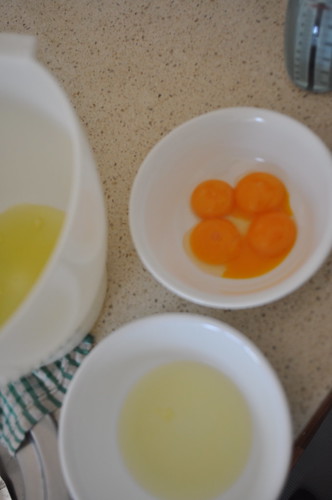
1 large whole egg plus 1 egg yolk
226.8gm semisweet choc chunks/Nestle's choc bits
113.4gm chopped pecans/nuts

_DSC0900
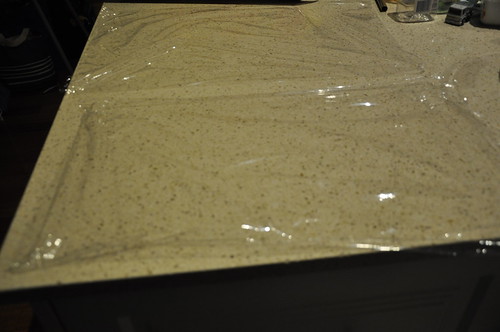
First, we lay out our clingwraps.

_DSC0902

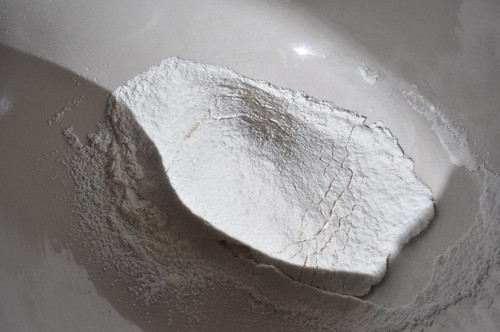
Although this brand of bread flour, said it was sifted thrice. I sifted thrice again. Imagine, it was sifted 6 times! This baby's gotta rise! I sifted it with the salt and baking soda.

_DSC0903
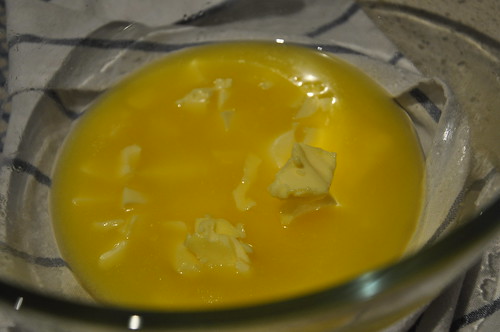
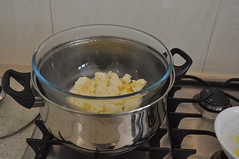
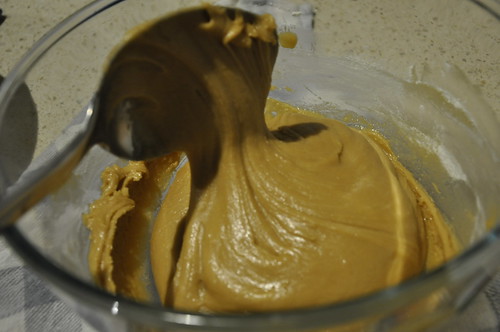
Then, we melt our butter...

_DSC0904

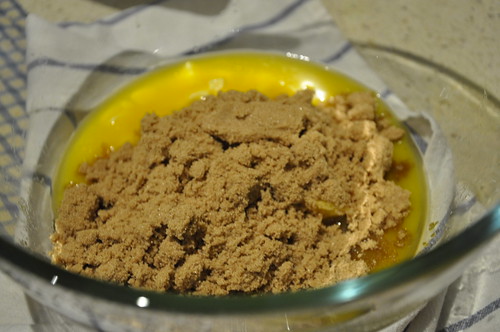
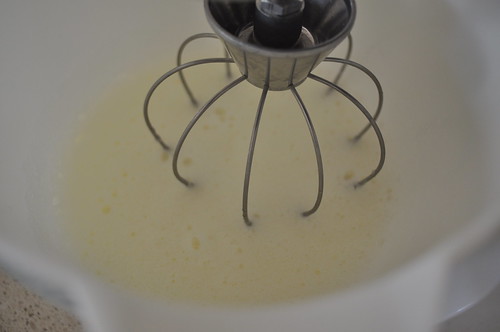
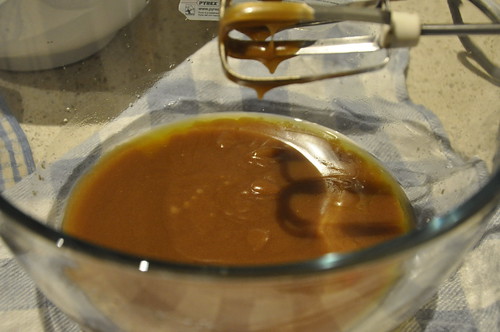
Then, we mix our brown sugar with an electric mixer, until it's well-combined. I hate it when recipes use this word...because I'm always guessing what 'well-combined' means. So...after guestimating what well-combined meant, I mixed it my vanilla essence and 1 egg and 1 yolk (I'm so glad I did that..I almost wanted to mix it the whole egg).

_DSC0919

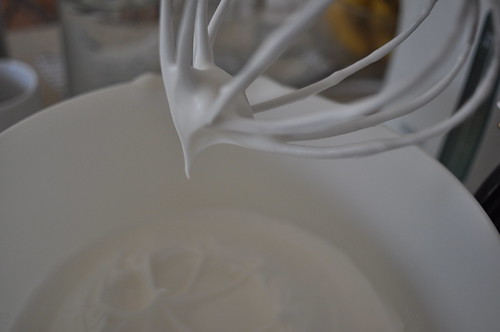
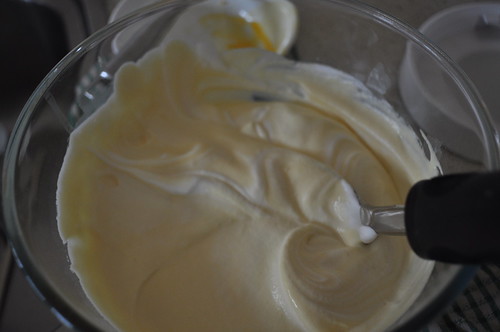
Looking decidedly well mixed, I added in flour, s-l-o-w-l-y.

_DSC0922

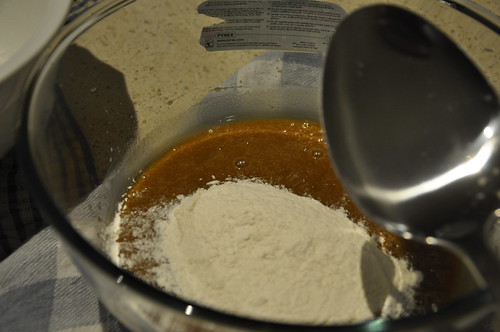
One scoop at a time, and cutting and folding. At first, it seemed like there wouldn't be enough flour....but trust me, when you get to the end..it's all good.

_DSC0923

And might I add, your arms get a real workout too!

_DSC0924
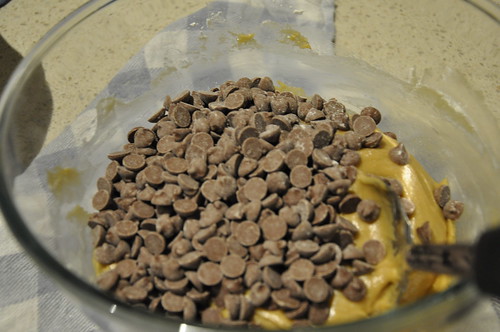
Add, the chocolate chips and mix well.

_DSC0925

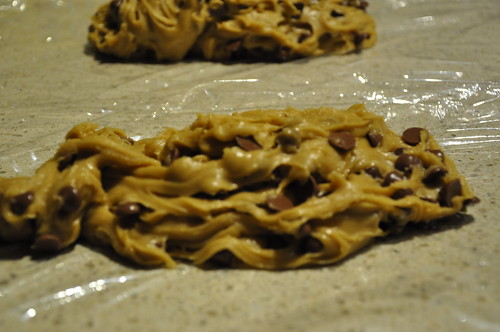
Spoon it out onto the clingwraps..I know, looks like something I'd rather not mention on a food blog. Ahem.


_DSC0905
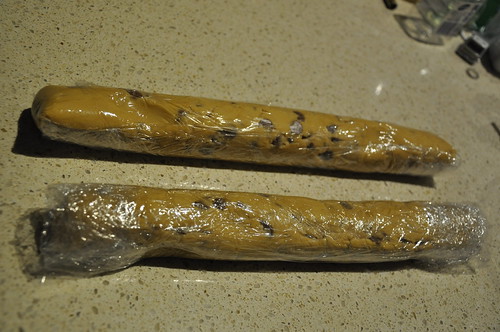
Sigh....and off to the fridge, these ugly babies go.

The first batch, I left in the fridge, for about 12 hours. I fired up our oven at 160Deg C. I actually bought an oven temperature earlier, knowing that my oven is abit temperamental...and it took about 1/2 hour for it to reach that temperature! Not the usual 10 minutes as most cookbooks would say. Hmph!

_DSC0914
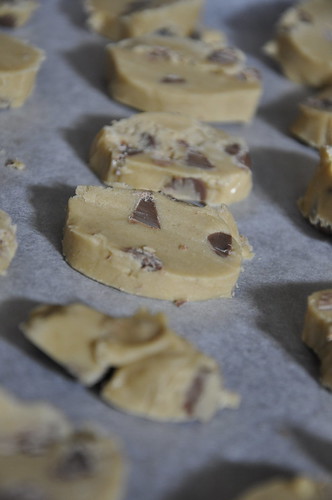
Since it's chilled, it's quite easy to cut it up.

I couldn't wait any longer..and quickly baked it. As I put it on timer (I had to tend to my younger kids)... it came out abit hard. Not as chewy as I wanted it to be. But, it was still crunchy..and didn't crumble that much. Very good quality choc chip cookies. I gave them all away. HA HA HA HA HA....Hey! They still tasted good..but they weren't chewy, which was what I was hankering for.

The second batch I made, was in the fridge for about 18 hours. I baked it for exactly 18 minutes..and yanked it out of the oven, to cool. I could not wait..and had my first bite at the 5th minute. It's sooooooooooooooOOOOOOOOoooooooooooooo fantastic. Left it overnite..and it still tastes great. And very chewy too.

_DSC0917

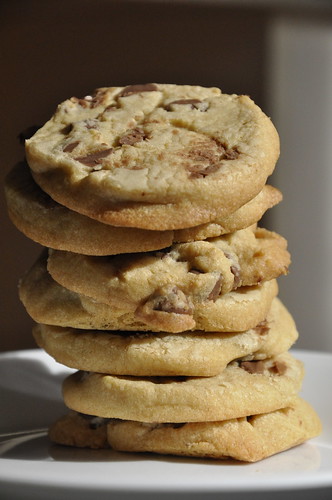
If you like it more crunchy, by all means, bake it about 2 minutes longer.

All thanks to that 16 year old guy, who I sincerely hope will keep his passion for cooking, aflamed in his heart for a long long time!

Saturday, May 16, 2009

Cotton Soft Japanese Cheesecake - The noob way

DSC_0883

This is the absolute beginner's step by step version. If you are an experienced baker..please, this is quite embarrassing for me. But you have to leave.

I baked this cake for the very first time today. In fact, it is the first ever time, baking a sponge-like cake. I'm not counting in the times, I helped my mother, because it would be stupid to do so.

This is the step by step, with lots of pictures, forgive the bad lighting, I just have no time to photoedit them. I'm a mother of three, struggling to make ends meet! HA HA HA..

I got this recipe through another blogger, Constance from Fad About Food. From the links, where the original recipe is found, there are several helpful comments and that's how I came up with this step by step guide, because I realised, there are many noobs like me out there!

I just want to point out, that for cakes, there is no such thing as simply whack. There is an exact science to getting perfect cakes. I fail in them most of the time, but today, I adhered to many of my mother's golden rules. Amazingly, I actually was listening back then!

So, please...if I say or show the wrong thing, tell me...

Ingredients :
140gm Castor Sugar (or fine granulated sugar)
6 egg whites
6 egg yolks (I used 60gm eggs)
1/4 tsp cream of tartar
50gm unsalted butter
250gm cream cheese (Philadelphia)
100ml fresh/low fat milk
1 tbsp lemon juice
60gm cake flour/self raising flour
20gm cornflour/corn starch
1/4 tsp salt.

Method:
1. Melt cream cheese, butter, salt and milk over a double boiler. I don't have a double boiler, so I used a huge pot, filled up with water and put in my lil steamer plate and my pyrex bowl on top of it.

DSC_0852DSC_0855

Cool the mixture. I decided to cover it, with a cloth to eliminate any water(steam) drips.

2. Sift self-raising flour, and cornflour, twice. I also sunned it, to give it more 'air'. My mom used to do that. It works, I guess.

DSC_0861

3. Separate the egg yolks and whites. Always remember to have three bowls. One for the separating action (just in case the yolks break, then at least you wouldn't have messed up the clean whites). As you can see, what happened to mine. I think it's ok, if there's a lil white with the yolks, but never vice versa.

DSC_0864

4. Fold in with a whisk, the combined flour, lemon juice, egg yolks and mix well.

DSC_0867

5. Whisk egg white (with a really good mixer) till foamy (see picture). Then add cream of tartar.

DSC_0866

6. Whisk till soft peaks.

DSC_0868

7. Slowly add in sugar. I used a teaspoon and added in one at a time. I waited for a few whisk turns before adding another. Until it's all well combined with sugar, beat until stiff moist consistency. See the difference between this picture and the one before? This is def. more stiffer and 'harder'. Almost like a meringue! (And from this, I know how to make meringues!!!! YAY!)

DSC_0870

8. Take 1/4 of the egg white, using whisk, stir into the flour and cream cheese mixture (from No.4). Actually, I used a "cut and fold" method. Where you use a big spoon, scraping the sides, making a full circle, the cut right into the middle, and fold and start making the full circle again. Helps capture the air, apparently.

DSC_0871

9. After well combined, put in remaining egg whites and use 'cut and fold' method and well combined. Don't overmix. That's what they say...but I honestly, have no clue what that means. Apparently, if you overmix, you'll release all the air and your mixture will flatten. Did I not say baking was an exact science???

DSC_0872

10. Prepare your 8" deep round tin. (Actually, you should prepare this first - duh....I'm so silly, only inserting this in now..).

DSC_0865

11. Bake cheesecake in a water bath. Basically putting the cake tin, in another bigger oven safe dish, filled with water. Bake at 160deg Celcius (never fan forced), for 1 hour 10 min.

DSC_0873

12. Once the oven "dings"...pls leave your cake in there. DO NOT OPEN THAT DOOR FOR ABOUT 2 hours. Or your cake will sink. Which mine did...because I was too greedy. But nonetheless...it tasted sooooo good! Just like it was store-bought. Best eaten fresh. Can't really keep for more than 1 day.

Thursday, February 12, 2009

Best Baby Porridge Ever!

The best Baby Porridge is made from the best Soup stock ever!

Soup Stock :

5-6 Chicken Carcasses (break them into small pieces, so it'll fit in the pot)
7-8 Garlic Pips
2-3 inches Ginger
1 tablesp of Black Peppercorns
Water (filled up over the chicken)

Boil for 20mins. Simmer for 2-3 hours. When cooled, pour stock through sieve, into another pot and store in fridge. Skim oil off, overnight. It keeps for 3 days.

Porridge :
Wash 1/4 cup rice thoroughly. Put carrots and pour stock in about half a small pot. Put on low flame for about 45 mins. Once thicken, put in any kind of vege and minced meat.

Cook abit more. That's it. It's so tasty, you want to eat it yourself.


If making noodles :
Just add some fried shallots and a little bit of salt (or none at all, it's so tasty!), to the soup stock. Note : Cook the vege n noodle separately. If you mix the stock up with the vege/noodle, it'll distort the taste.

Tuesday, December 02, 2008

Lasagna

This is my 2nd attempt. The first attempt went rather horribly wrong. Sigh...

The sauce is my all time favourite. It's the easiest thing to do. I perfected this sauce a longggg time ago. But the first time I made lasagna became disastrous..because I just sprinkled cheese INSTEAD of making the cheese sauce..and I used a pre-cooked lasagne sheet (from San Remo), which is a big NO-NO...since there wasn't any cheese sauce.

Plus, I was very stupid in layering. The last layer I put was a lasagna sheet, then I sprinkled the cheese. When it came out of the oven...the sheet was super duper hard..and the cheese..well, was slightly burnt. Luckily the layers below were alright..and the kids and I whacked the whole thing in.

So..here's my perfected version :

lasagna

Cheese sauce
A huge dollop of butter
3 tbs of flour
300gm cheese (I know..it's abit much, but I love cheese!)
2 cups of milk

Add butter to hot pot. When melted, stir in flour and it'll get lumpy. Mix it with milk and try to smoothen out lumps. Once smoothen, mix in Cheese. It should be nice and thick.

Lasagna sauce
1 onion, diced
3 garlic cloves, diced
800gm Italian whole Roma tomatoes
5-6 white button mushrooms (medium sized), diced
600gm beef mince (or you can mix 300gm beef and 300gm pork mince)
3 tbsp of tomato paste
dollops of oyster sauce
1 chinese dessert soup spoon of sugar
sprinkles of dried Italian herbs

Fry onion and garlic. Add minced meat and fry till browned. Add in mushrooms and tomatoes. Add in tomato paste, oyster sauce and sugar. If you like it spicy, add in some dried chilli flakes. Sprinkle in dried Italian herbs. Simmer for 35 minutes, until thick. It should not be watery or your lasagna will be....well, watery!

Lasagna Sheets
Cook according to package instructions.

First layer is the lasagna sheet. Then meat sauce, then cheese sauce. Last layer is meat sauce, cheese sauce. Then scatter some parmesan cheese over. Bake for about 20 minutes under 180 C. It'll smell heavenly....

bon appetit!

Wednesday, September 10, 2008

Peppercorns


Peppercorns are my absolute best friends when it comes to soup. It makes any soup instantly richer. However, to release it's wonderful flavour, you'd have to boil/simmer the soup for at least 2 hours. But it's all worthed it.

Minced Chicken Patties

This is great for school lunchtime meal or picnics, as it can be prepared ahead of time and eaten cold! I've been looking for this recipe online, only to find it in one of my cookbooks! Must remember this recipe!!

Ingredients :
200gm minced lean chicken
1/2 medium onion, finely chopped
1 medium potato, boiled and mashed
1 Ch sp finely chopped leak (optional)
2 tsp light soya sauce
1/2 tsp Hua Tiao wine / sherry wine
a few drops of ginger juice (optional)
dash of pepper and salt
1 ch sp oil

Method :
1. Marinate the mince chicken with all the ingredients except oil and shape into small flat patties.
2. Heat the oil in a frying pan and fry the patties until light brown and cooked.

Easy peasy. Prepare overnight, store in fridge.

Friday, August 15, 2008

Meatballs

For Italian Meatballs

Ingredients

* 1 1/2 lbs ground beef
* 1/2 lb ground pork
* 2 slices bread
* 1/4 cup milk
* 1 egg
* 1/4 cup grated parmesan cheese
* 3-4 garlic cloves, pressed or minced
* 1 teaspoon oregano
* 1 teaspoon parsley
* 1/2 teaspoon italian seasoning
* 1/4 teaspoon dried red pepper flakes
* 1/2 teaspoon salt
* 1/4 teaspoon pepper

Directions

1. Preheat oven to 375 degrees F.
2. Soak 2 slices of bread in 1/4 cup milk for 10 minutes.
3. Don't squeeze out the milk, as adding the milk and bread to the meat mixture will make the meatballs very tender.
4. Add all other ingredients to the wet bread and milk and mix well with hands.
5. Roll meat into balls (about the size of a golf ball) and place on a cookie sheet.
6. Bake in preheated oven for about 35-40 minutes or until meat is done.
7. Add to spaghetti sauce and let simmer in sauce for at leat 30 minutes before serving.

For Swedish Meatballs, Just omit all the Eye-Talian stuff. If you don't know what it is...you're a sad sad person. ;-)

meatballs These are swedish meatballs.

For the brown sauce,
2 tbsp Butter
2 tbsp Flour
1 1/4 cup beef broth
salt n pepper.

In a very low fire and a very small wok, melt the butter. Once butter is melted, add flour and make a roux. Slowly add in broth until it thickens to a smooth texture. Add salt and pepper.
;-)

Thursday, May 01, 2008

Simple Braised Beef Stew

Serves 4
Prep Time : abt 15min
Cooking Time : Abt 1 1/2 hours

Ingredients
2-3 Beef Spare Ribs (The more the merrier)
500gm Lean Beef (eye fillet is the best)
1/2 bunch of celery - chopped
4 carrots - chopped
1 can of chopped/whole tomatoes
3 Brown Onions - chopped
2 cloves of Garlic - chopped
Dashes of oyster sauce
2 tbsp of tomato paste
2 tbsp of curry powder
1 tsp of 5 spice powder
Salt, Pepper to taste
Water

Basically, marinate the spare ribs with cornflour, salt and pepper. Let it sit for a bit.

Heat up Oil in Soup Pot, fry the onions and garlic.

Throw in the carrots, celery and stir them around.

Throw in the spare ribs...stir stir stir.

Throw in the oyster sauce, can of chopped tomatoes and tomato paste.

Throw in the curry powder and 5 spice.

OH YA! Throw in some water also...make sure it's not burnt yet...yea? ;-)

Let it boil, then turn down heat to simmer.

When the meat falls off the bone..it's time to dish out. Best with white rice or rolls. Also, best to eat when it's wintery or autumny...YUMMMMMMMMMMMMM!!!!!!!